前言 记得刚接触 C# 开发那会儿,因为经验不足经常犯一些很幼稚的错误,其中发布程序忘记将引用打包就是其中一个。
但是截止到现在,桌面应用程序做的都是一些“玩具”,打包安装感觉使用体验不好,所以现在仍然喜欢使用“绿色免安装”。
虽然免安装了,但是如果引用了一些程序集或者动态链接库,使用起来体验总不太好,特别是拿给别人用,要知道有些电脑小白拷贝可是连快捷方式和可执行文件都分不清。
所以,这里主要总结以下程序集打包、动态链接库的打包方法,而且网上关于程序集打包的文章很常见,但是动态链接库比较少,所以还是值得拿出来分享一下的。
打包引用程序集 这里和网上一样,主要从两方面来说,首先是将程序集作为资源嵌入到主程序中,然后在程序运行时从资源中加载。
另外一种是网上比较常见的,使用 Fody 来管理程序集打包与打包程序集的加载,但本质上两种方案是一样的。
使用 AssemblyResolve 事件打包 了解过反射知识应该都知道 Assembly 的 Load 方法可以动态加载程序集,实现一些插件的效果。
首先我们创建一个控制台项目,并通过 NuGet 引用我们常用的 Newtonsoft.Json 程序集,入口函数代码如下:
1 2 3 4 5 6 7 8 9 10 static void Main (string [] args var obj = new { name = "hd2y" , gender = "M" , hobby = "coding" , website = "https://hd2y.net" }; string json = JsonConvert.SerializeObject(obj); Console.WriteLine(json); Console.ReadKey(); }
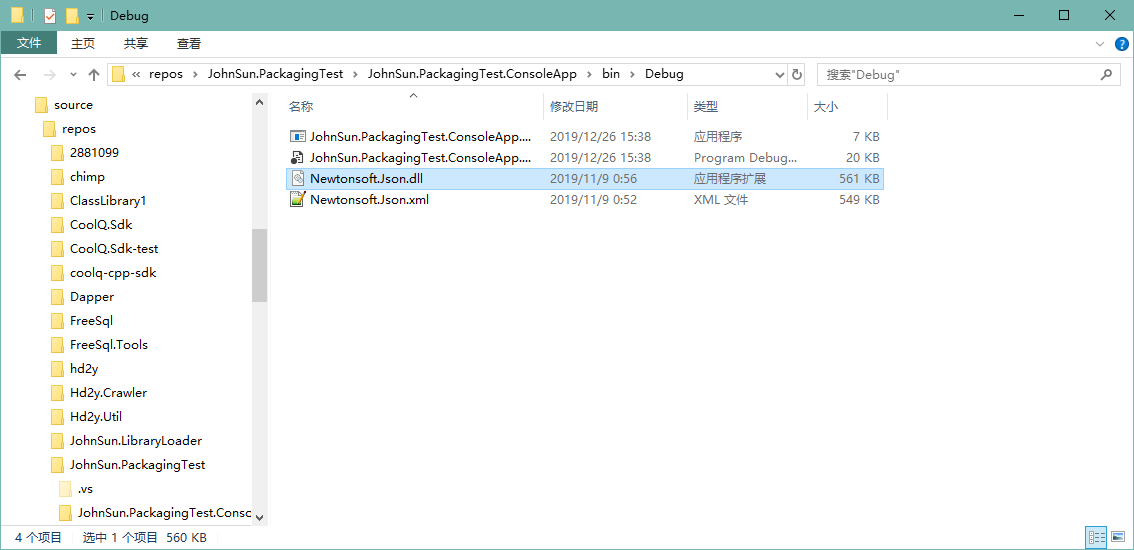
这时可以正常运行,是因为我们生成后,我们引用的程序集会自动复制到运行目录下:
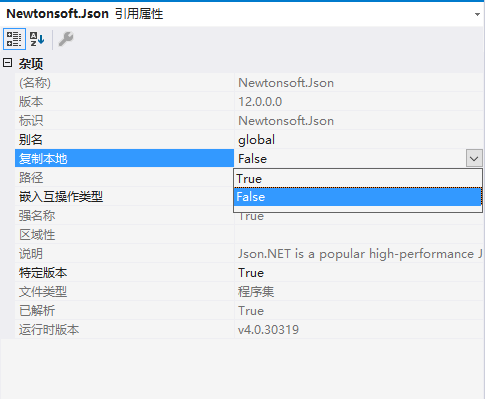
这时因为默认情况下,引用属性中“复制本地”被设置为 True,我们可以进行调整:
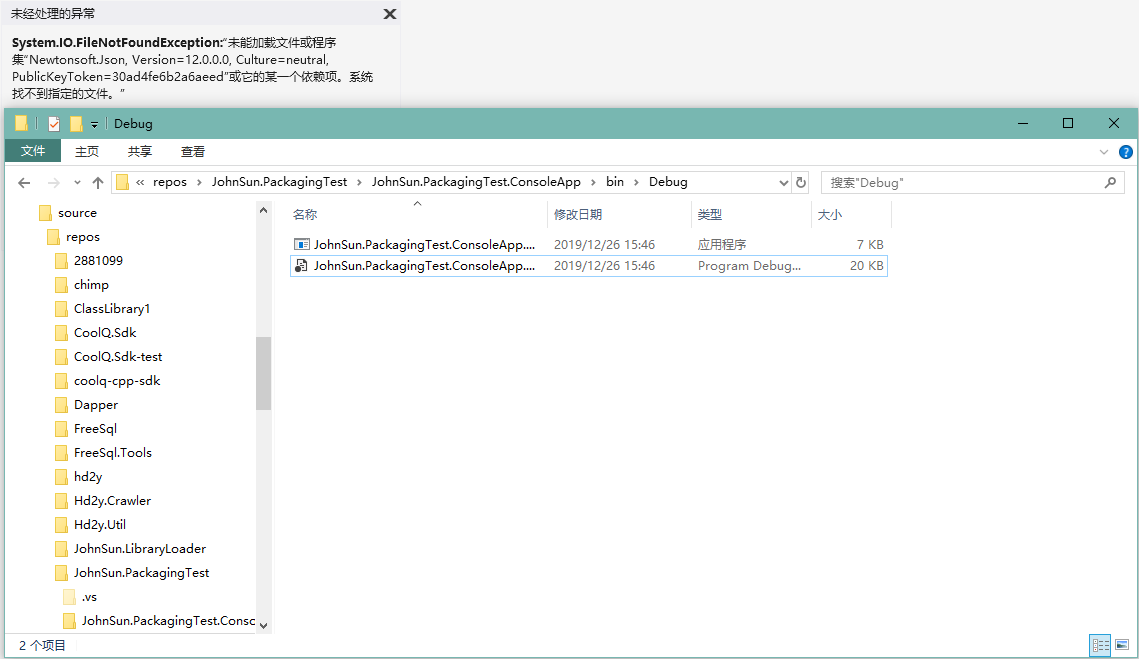
然后我们重新生成项目,可以发现 Newtonsoft.Json.dll 从我们的运行目录中消失,并且程序无法再正常执行:
这时我们只需要将程序集打包到程序中,并在程序开始运行时,从资源文件中将程序集加载即可。
(一)将程序集打包到主程序中
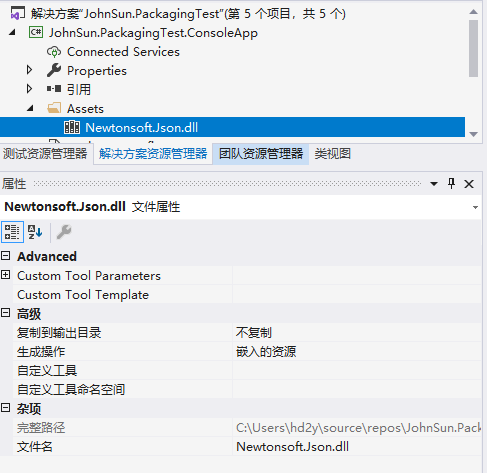
首先在项目中添加一个 Assets 文件夹,通过查看 Newtonsoft.Json 的引用属性查看程序集所在路径,将程序集拷贝到新建的 Assets 文件夹,并设置 Newtonsoft.Json.dll 的属性,复制到输出路径 设置为 不复制;生成操作 修改为 嵌入的资源。
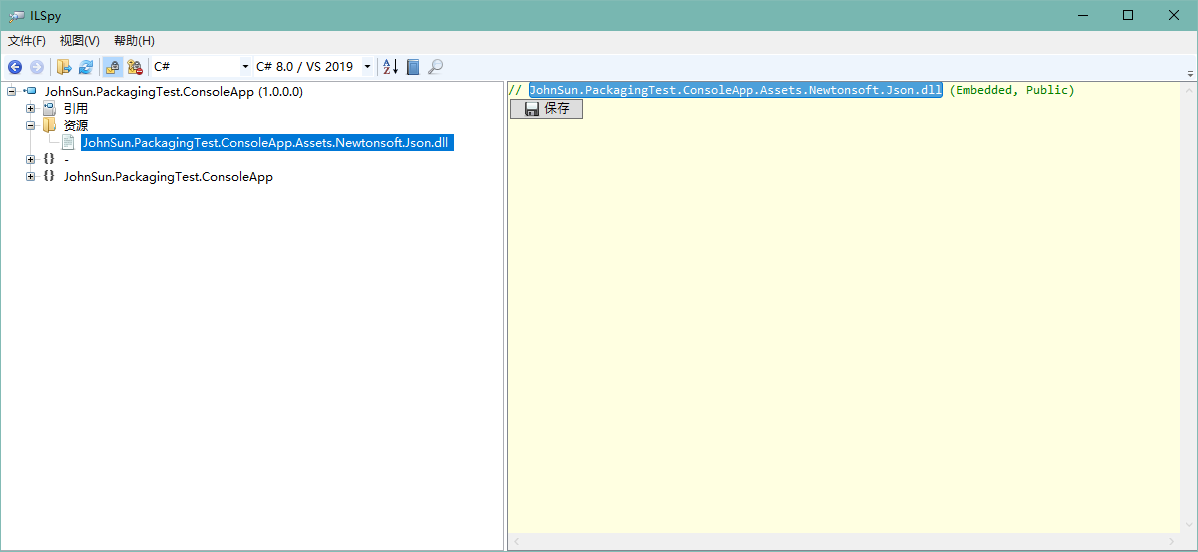
这时,我们可以通过反编译工具查看我们嵌入的资源文件:
(二)程序运行时从嵌入资源中加载程序集
然后我们在程序入口添加静态构造函数,注册 AssemblyResolve 事件,使程序集加载失败,我们能正常从嵌入资源中加载。
1 2 3 4 5 6 7 8 9 10 11 12 13 14 15 16 17 18 19 20 21 22 23 24 25 26 27 28 class Program { static Program ( AppDomain.CurrentDomain.AssemblyResolve += (sender, args) => { if (args.Name.StartsWith("Newtonsoft.Json," )) { using (Stream stream = typeof (Program).Assembly.GetManifestResourceStream("JohnSun.PackagingTest.ConsoleApp.Assets.Newtonsoft.Json.dll" )) { byte [] rawAssembly = new byte [stream.Length]; stream.Read(rawAssembly, 0 , rawAssembly.Length); return Assembly.Load(rawAssembly); } } return null ; }; } static void Main (string [] args var obj = new { name = "hd2y" , gender = "M" , hobby = "coding" , website = "https://hd2y.net" }; string json = JsonConvert.SerializeObject(obj); Console.WriteLine(json); Console.ReadKey(); } }
这时我们重新运行程序,程序即可正常运行。
使用 Fody.Costura Fody 为我们提供了一个简单的方式,只需要通过 NuGet 引用 Fody.Costura,然后生成项目就会自动将程序集打包。
我们可以新创建一个项目 JohnSun.PackagingTest.FodyCostura 进行测试,首先使用 NuGet 添加 Newtonsoft.Json 与 Fody.Costura 的引用。
同样我们修改入口,序列化一个对象,并打印到控制台:
1 2 3 4 5 6 7 8 9 10 class Program { static void Main (string [] args var obj = new { name = "hd2y" , gender = "M" , hobby = "coding" , website = "https://hd2y.net" }; string json = JsonConvert.SerializeObject(obj); Console.WriteLine(json); Console.ReadKey(); } }
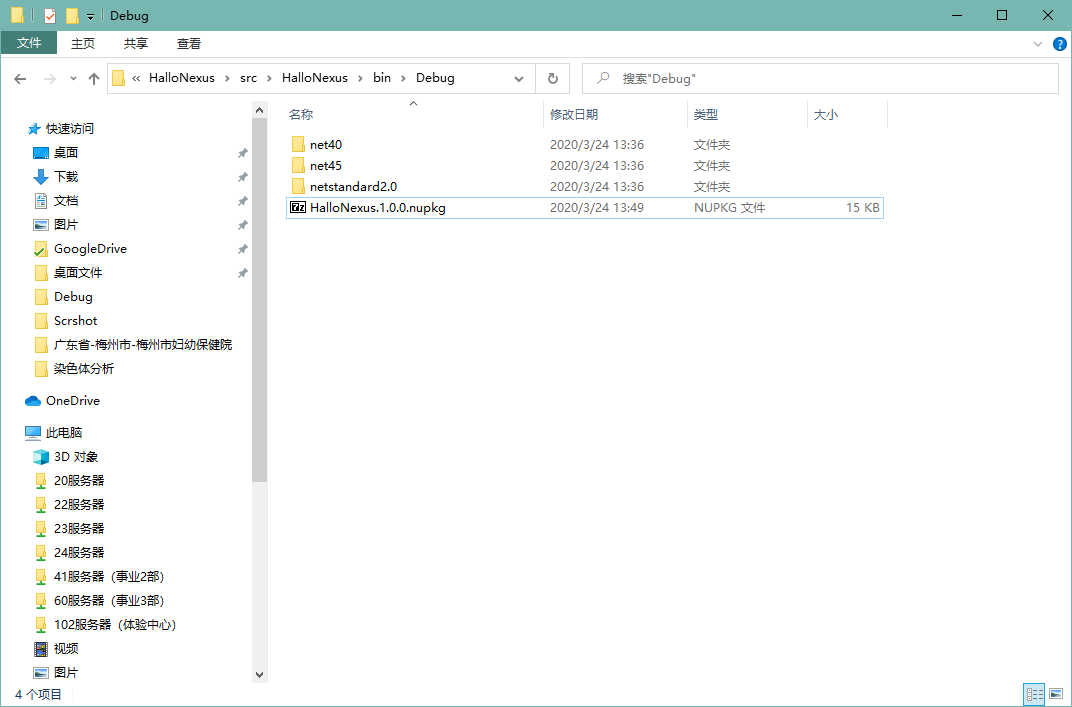
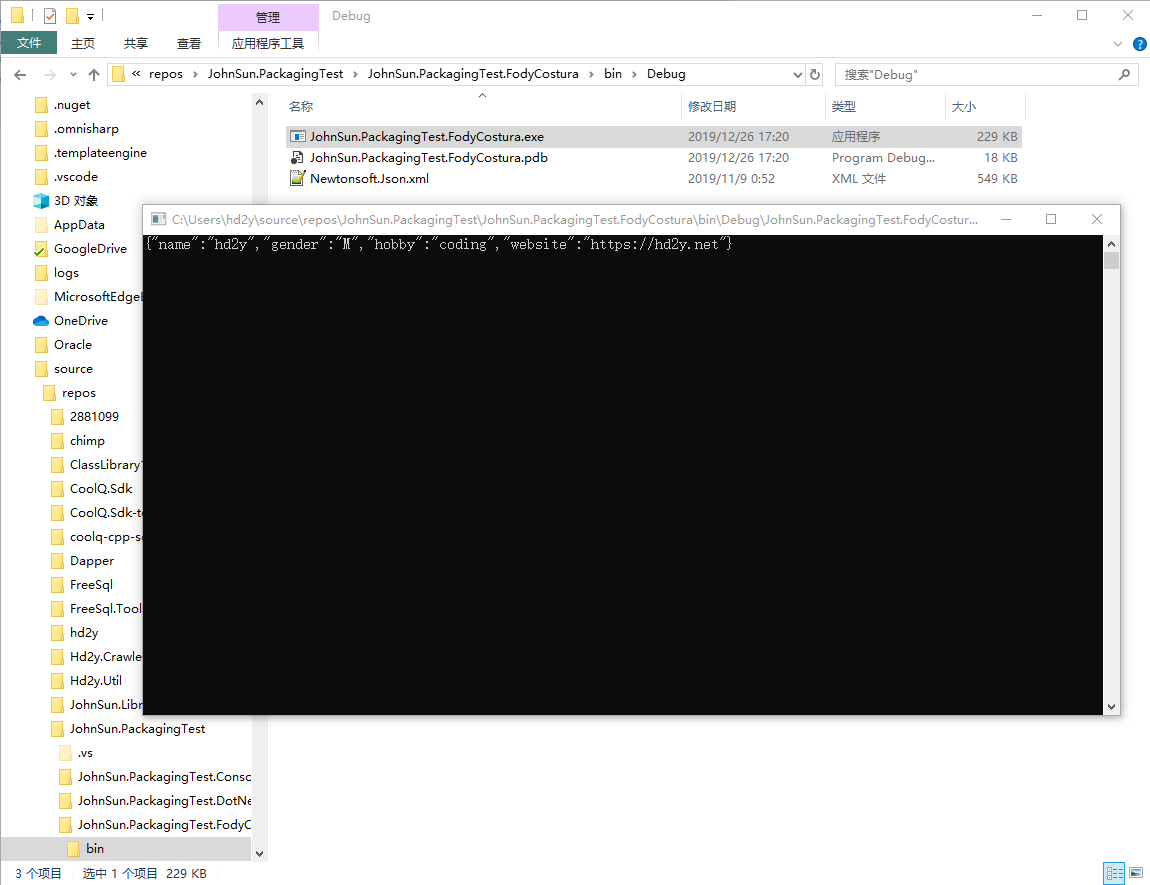
我们到生成目录可以查看一下生成的文件,可以看到只有一个文件,我们引用的程序集没有复制到该目录,但是生成的项目可以正常运行:
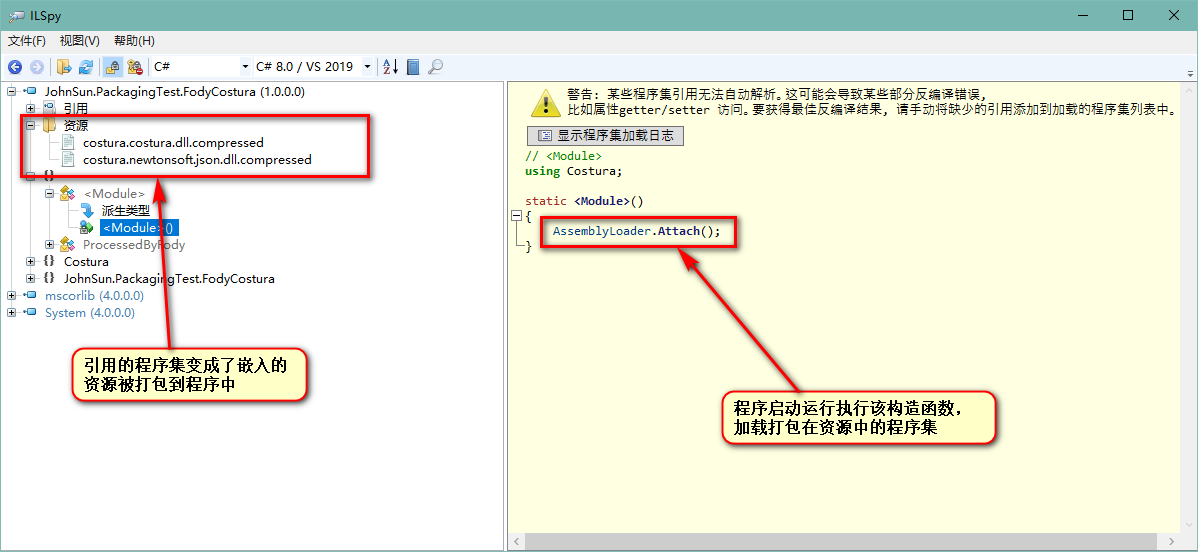
感觉挺神奇的,但是我们同样可以通过反编译,了解具体是怎么实现这个效果的:
然后我们具体的看一下 AssemblyLoader 的代码做什么事情:
1 2 3 4 5 6 7 8 9 10 11 12 13 14 15 16 17 18 19 20 21 22 23 24 25 26 27 28 29 30 31 32 33 34 35 36 37 38 39 40 41 42 43 44 45 46 47 48 49 50 51 52 53 54 55 56 57 58 59 60 61 62 63 64 65 66 67 68 69 70 71 72 73 74 75 76 77 78 79 80 81 82 83 84 85 86 87 88 89 90 91 92 93 94 95 96 97 98 99 100 101 102 103 104 105 106 107 108 109 110 111 112 113 114 115 116 117 118 119 120 121 122 123 124 125 126 127 128 129 130 131 132 133 134 135 136 137 138 139 140 141 142 143 144 145 146 147 148 149 150 151 152 153 154 155 156 157 158 159 160 161 162 163 164 165 166 167 168 169 170 171 172 173 174 175 176 177 178 179 180 181 182 183 184 185 186 187 188 189 190 using System;using System.Collections.Generic;using System.Globalization;using System.IO;using System.IO.Compression;using System.Reflection;using System.Runtime.CompilerServices;using System.Threading;[CompilerGenerated ] internal static class AssemblyLoader { private static object nullCacheLock = new object (); private static Dictionary <string , bool > nullCachenew Dictionary<string , bool >(); private static Dictionary <string , string > assemblyNamesnew Dictionary<string , string >(); private static Dictionary <string , string > symbolNamesnew Dictionary<string , string >(); private static int isAttached; private static string CultureToString (CultureInfo culture ) if (culture == null ) { return "" ; } return culture.Name; } private static Assembly ReadExistingAssembly (AssemblyName name ) Assembly[] assemblies = AppDomain.CurrentDomain.GetAssemblies(); foreach (Assembly assembly in assemblies) { AssemblyName name2 = assembly.GetName(); if (string .Equals(name2.Name, name.Name, StringComparison.InvariantCultureIgnoreCase) && string .Equals(CultureToString(name2.CultureInfo), CultureToString(name.CultureInfo), StringComparison.InvariantCultureIgnoreCase)) { return assembly; } } return null ; } private static void CopyTo (Stream source, Stream destination ) byte [] array = new byte [81920 ]; int count; while ((count = source.Read(array, 0 , array.Length)) != 0 ) { destination.Write(array, 0 , count); } } private static Stream LoadStream (string fullName Assembly executingAssembly = Assembly.GetExecutingAssembly(); if (fullName.EndsWith(".compressed" )) { using (Stream stream = executingAssembly.GetManifestResourceStream(fullName)) { using (DeflateStream source = new DeflateStream(stream, CompressionMode.Decompress)) { MemoryStream memoryStream = new MemoryStream(); CopyTo(source, memoryStream); memoryStream.Position = 0L ; return memoryStream; } } } return executingAssembly.GetManifestResourceStream(fullName); } private static Stream LoadStream (Dictionary<string , string > resourceNames, string name ) if (resourceNames.TryGetValue(name, out string value )) { return LoadStream(value ); } return null ; } private static byte [] ReadStream (Stream stream ) byte [] array = new byte [stream.Length]; stream.Read(array, 0 , array.Length); return array; } private static Assembly ReadFromEmbeddedResources (Dictionary<string , string > assemblyNames, Dictionary<string , string > symbolNames, AssemblyName requestedAssemblyName ) string text = requestedAssemblyName.Name.ToLowerInvariant(); if (requestedAssemblyName.CultureInfo != null && !string .IsNullOrEmpty(requestedAssemblyName.CultureInfo.Name)) { text = requestedAssemblyName.CultureInfo.Name + "." + text; } byte [] rawAssembly; using (Stream stream = LoadStream(assemblyNames, text)) { if (stream == null ) { return null ; } rawAssembly = ReadStream(stream); } using (Stream stream2 = LoadStream(symbolNames, text)) { if (stream2 != null ) { byte [] rawSymbolStore = ReadStream(stream2); return Assembly.Load(rawAssembly, rawSymbolStore); } } return Assembly.Load(rawAssembly); } public static Assembly ResolveAssembly (object sender, ResolveEventArgs e lock (nullCacheLock) { if (nullCache.ContainsKey(e.Name)) { return null ; } } AssemblyName assemblyName = new AssemblyName(e.Name); Assembly assembly = ReadExistingAssembly(assemblyName); if (assembly != null ) { return assembly; } assembly = ReadFromEmbeddedResources(assemblyNames, symbolNames, assemblyName); if (assembly == null ) { lock (nullCacheLock) { nullCache[e.Name] = true ; } if ((assemblyName.Flags & AssemblyNameFlags.Retargetable) != 0 ) { assembly = Assembly.Load(assemblyName); } } return assembly; } static AssemblyLoader ( assemblyNames.Add("costura" , "costura.costura.dll.compressed" ); assemblyNames.Add("newtonsoft.json" , "costura.newtonsoft.json.dll.compressed" ); } public static void Attach ( if (Interlocked.Exchange(ref isAttached, 1 ) != 1 ) { AppDomain.CurrentDomain.AssemblyResolve += delegate (object sender, ResolveEventArgs e) { lock (nullCacheLock) { if (nullCache.ContainsKey(e.Name)) { return null ; } } AssemblyName assemblyName = new AssemblyName(e.Name); Assembly assembly = ReadExistingAssembly(assemblyName); if (assembly != null ) { return assembly; } assembly = ReadFromEmbeddedResources(assemblyNames, symbolNames, assemblyName); if (assembly == null ) { lock (nullCacheLock) { nullCache[e.Name] = true ; } if ((assemblyName.Flags & AssemblyNameFlags.Retargetable) != 0 ) { assembly = Assembly.Load(assemblyName); } } return assembly; }; } } }
实际上也是通过 AssemblyResolve 实现了程序集的加载,但是这个过程变成了编译时自动执行。
如果想要手动的指定在什么时候加载资源中的程序集,我们可以添加一个 FodyWeavers.xml 文件到项目中:
1 2 <?xml version="1.0" encoding="utf-8"?> <Weavers > </Weavers >
这时我们只需要生成,xml 文件的内容会发生变化:
1 2 <?xml version="1.0" encoding="utf-8"?> <Weavers xmlns:xsi ="http://www.w3.org/2001/XMLSchema-instance" xsi:noNamespaceSchemaLocation ="FodyWeavers.xsd" > </Weavers >
因为自动引入了 xsd 文件,我们编辑会 xml 时会有提示,我们可以修改以指定不在模块初始化时加载程序集:
1 2 3 4 <?xml version="1.0" encoding="utf-8"?> <Weavers xmlns:xsi ="http://www.w3.org/2001/XMLSchema-instance" xsi:noNamespaceSchemaLocation ="FodyWeavers.xsd" > <Costura LoadAtModuleInit ="false" /> </Weavers >
这时我们生成项目会报错:
1 Fody: Costura was not initialized. Make sure LoadAtModuleInit=true or call CosturaUtility.Initialize(). JohnSun.PackagingTest.FodyCostura
从提示可以知道,我们需要通过调用 CosturaUtility.Initialize() 方法,手动的指定程序集加载。
1 2 3 4 5 6 7 8 9 10 11 12 13 14 class Program { static Program ( CosturaUtility.Initialize(); } static void Main (string [] args var obj = new { name = "hd2y" , gender = "M" , hobby = "coding" , website = "https://hd2y.net" }; string json = JsonConvert.SerializeObject(obj); Console.WriteLine(json); Console.ReadKey(); } }
这时我们就可以顺利通过编译并可以正常的运行项目,但是需要注意的是,我们要将对应代码加在静态构造函数内,确保对象初始化前能够顺利将程序集加载。
实际上 Fody 还有很多有趣的项目,可以到 GitHub 上查看:https://github.com/Fody 。
.NET Core 3.0 的新特性已经支持将程序打包成独立可执行文件:Single-file executables
打包动态链接库 动态链接库我所知道的使用方法有以下几种:
使用 Regsvr32 命令注册动态链接库;
直接将动态链接库放在执行程序所在目录;
使用 kernel32 的 LoadLibrary 方法动态装载指定目录下的动态链接库;
当然平时偷懒更多是使用第二种方案,既然是要介绍将动态链接库打包,这里自然是要使用第三种动态装载的方案。
另外还有一个优势就是,因为 x86 与 x64 的动态链接库,在创建的 32 或 64 位应用程序时需要注意不能引用错误,如果动态的装载,我们就可以根据程序运行环境选择合适的动态链接库。
过去的解决方案是程序属性将生成目标平台修改为 x86,因为一般供我们调用的动态链接库也是 Win32 的。这样如果该程序集我们需要应用于网站,部署 IIS 还需要调整应用程序池,并因此还可能产生其他问题,所以不推荐。
创建 C++ 动态链接库供测试 如果想要调用,自然先要有一个动态链接库供我们测试,这里直接创建 C++ 的动态链接库项目,修改 pch.h 头文件:
1 2 3 4 5 6 7 8 9 10 11 12 13 14 15 16 17 18 19 20 21 22 23 24 #ifndef PCH_H #define PCH_H #include "framework.h" #endif #ifdef IMPORT_DLL #else #define IMPORT_DLL extern "C" _declspec(dllimport) #endif IMPORT_DLL double Addition (double a, double b) ;IMPORT_DLL double Subtraction (double a, double b) ;IMPORT_DLL double Multiplication (double a, double b) ;IMPORT_DLL double Division (double a, double b) ;
增加对应的源文件 SimpleMath.cpp:
1 2 3 4 5 6 7 8 9 10 11 12 13 14 15 16 17 18 19 20 21 #include "pch.h" double Addition (double a, double b) return a + b; } double Subtraction (double a, double b) return a - b; } double Multiplication (double a, double b) return a * b; } double Division (double a, double b) return a / b; }
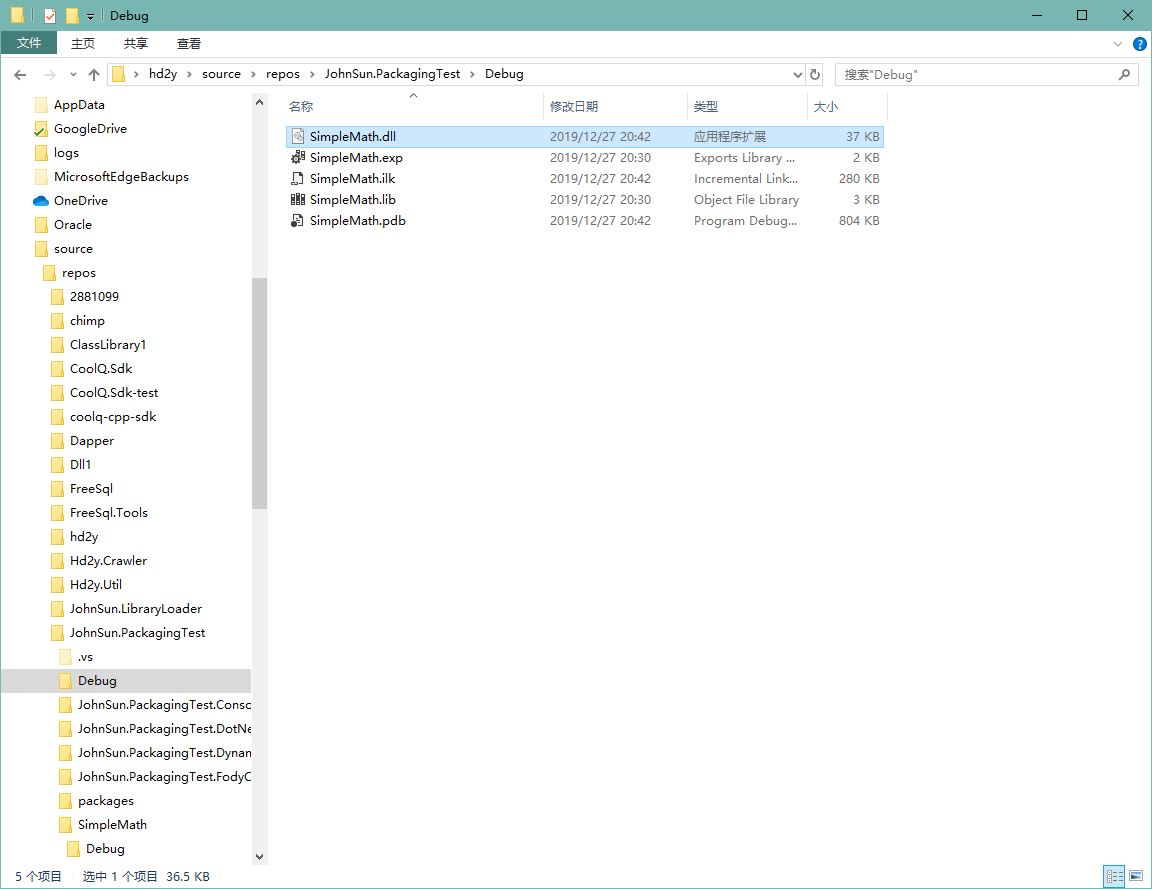
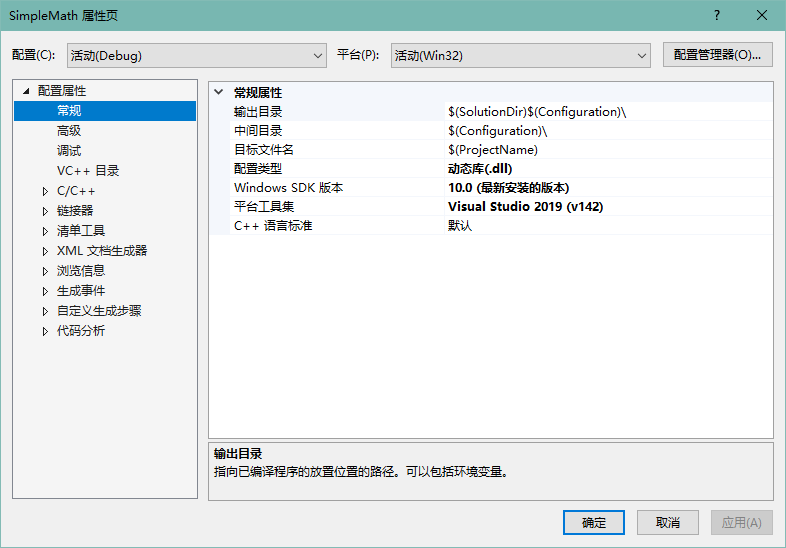
直接编译生成即可,但是需要注意的是,C++ 的项目生成出的动态链接库的位置与 C# 程序集的路径不太一样,我这里位置是在解决方案目录内,可以通过项目属性查看与配置。
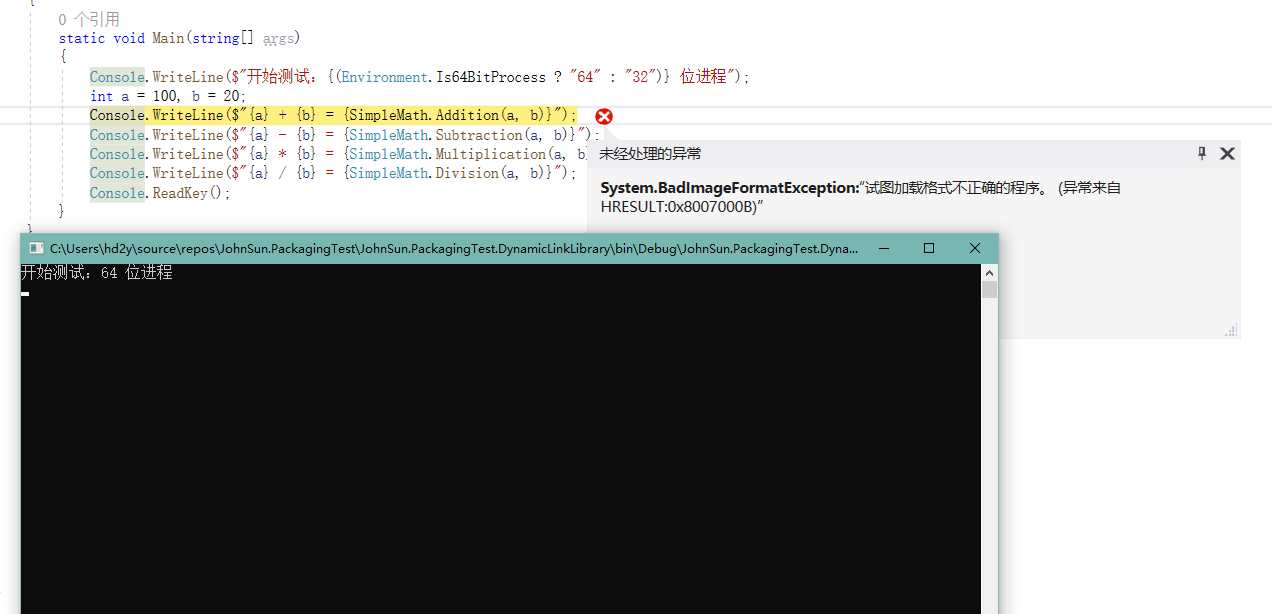
常规应用方案 查看 C++ 动态链接库项目属性可以注意到平台为 活动(Win32),所以我们可以将该动态链接库拷贝到我们的运行目录下(这里是调试目录),但是项目无法正常运行。
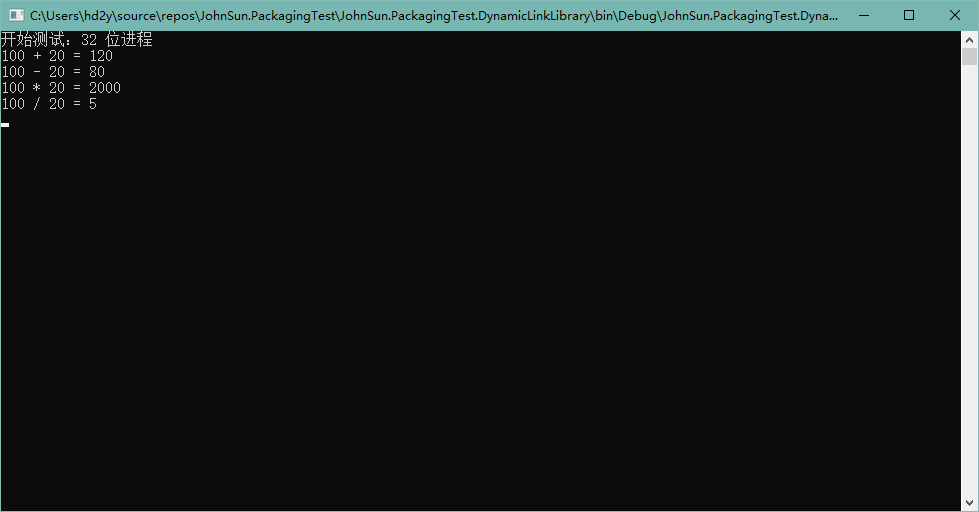
1 2 3 4 5 6 7 8 9 10 11 12 13 14 15 16 17 18 19 20 21 22 23 24 25 26 class Program { static void Main (string [] args Console.WriteLine($"开始测试:{(Environment.Is64BitProcess ? "64" : "32" )} 位进程" ); int a = 100 , b = 20 ; Console.WriteLine($"{a} + {b} = {SimpleMath.Addition(a, b)} " ); Console.WriteLine($"{a} - {b} = {SimpleMath.Subtraction(a, b)} " ); Console.WriteLine($"{a} * {b} = {SimpleMath.Multiplication(a, b)} " ); Console.WriteLine($"{a} / {b} = {SimpleMath.Division(a, b)} " ); Console.ReadKey(); } } public class SimpleMath { [DllImport("SimpleMath" , CallingConvention = CallingConvention.Cdecl) ] public static extern double Addition (double a, double b [DllImport("SimpleMath" , CallingConvention = CallingConvention.Cdecl) ] public static extern double Subtraction (double a, double b [DllImport("SimpleMath" , CallingConvention = CallingConvention.Cdecl) ] public static extern double Multiplication (double a, double b [DllImport("SimpleMath" , CallingConvention = CallingConvention.Cdecl) ] public static extern double Division (double a, double b }
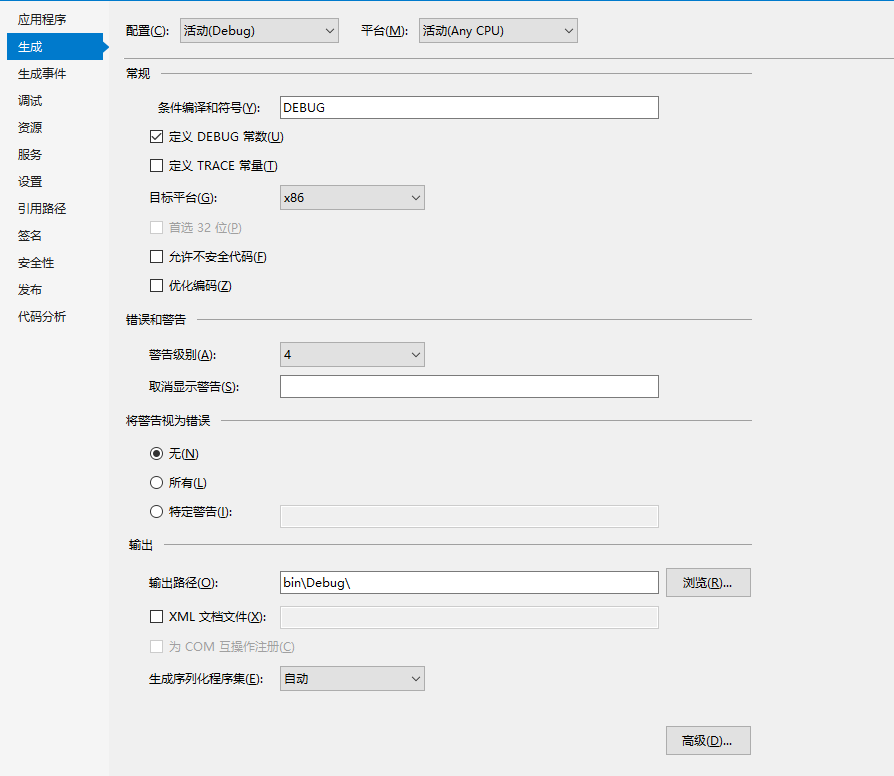
如上图所示,因为我的系统是 64 位,所以默认 Debug 是以 x64 运行,这时我们需要修改我们运行控制台的 目标平台 为 x86。
修改完成以后程序即可成功执行:
解决 x64 无法运行问题 默认 64 位进程无法执行的原因是因为我们没有提供 x64 的动态链接库,当然如果我们需要调用的没有提供 x64 平台的动态链接库,那么问题到这里就已经终止了,那就是没有解决方案,可以跳过以下内容。
如果我们第三方或者我们从网上,找到的一些我们需要使用的动态链接库,同时提供了 x86 和 x64 平台,那么问题就很好解决了。
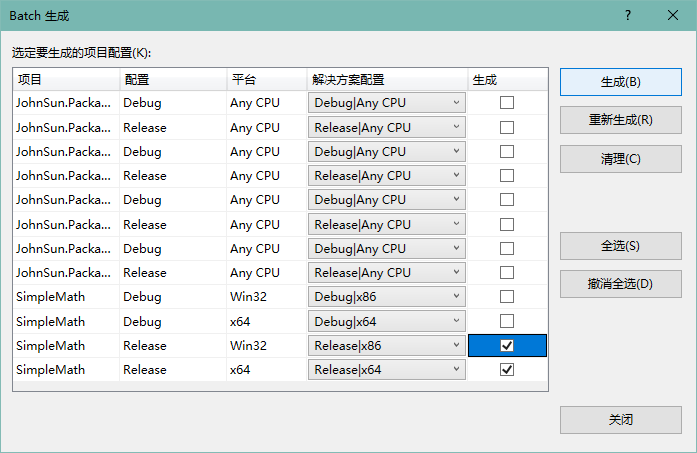
我们通过批生成,将我们添加的 C++ 动态链接库项目生成出满足我们测试的版本(VS 菜单栏 -> 生成 -> 批生成 -> Batch 生成):
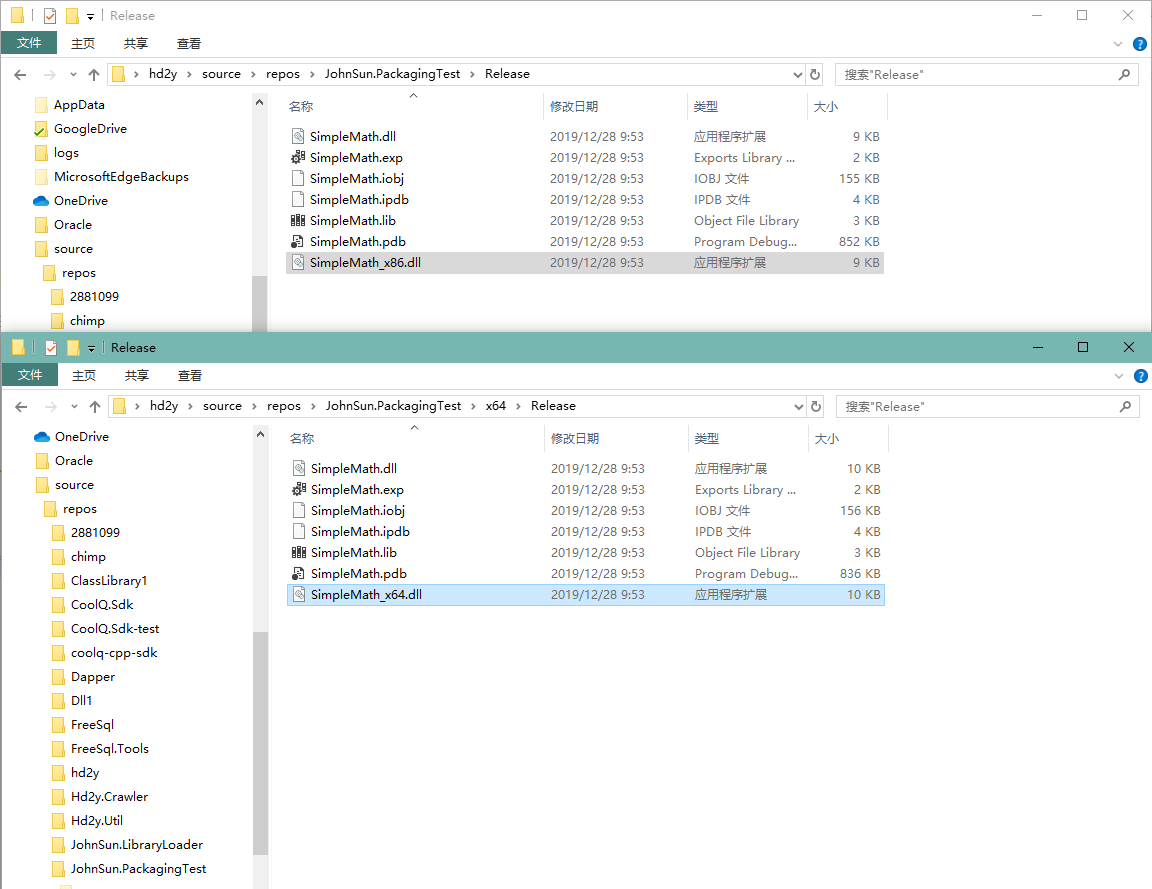
如上图所示,我们选择了 Release|x86 与 Release|x64 平台的生成,为了方便区分,我们找到生成目录,将原来的动态链接库名称修改,调整为带有目标平台的名称:
然后我们将动态链接库拷贝到我们的控制台项目中,为了方便测试,将动态链接库文件属性修改:生成操作 调整为 无,复制到输出目录 调整为 始终复制。
接下来我们修改项目 SimpleMath 的代码,让一份代码能够同时兼容 x86 与 x64 平台:
1 2 3 4 5 6 7 8 9 10 11 12 13 14 15 16 17 18 19 20 21 22 23 24 25 26 27 28 29 30 31 32 33 34 35 36 37 38 39 40 41 42 43 44 public class SimpleMath { [DllImport("SimpleMath_x86" , EntryPoint = "Addition" , CallingConvention = CallingConvention.Cdecl) ] public static extern double Addition_x86 (double a, double b [DllImport("SimpleMath_x86" , EntryPoint = "Subtraction" , CallingConvention = CallingConvention.Cdecl) ] public static extern double Subtraction_x86 (double a, double b [DllImport("SimpleMath_x86" , EntryPoint = "Multiplication" , CallingConvention = CallingConvention.Cdecl) ] public static extern double Multiplication_x86 (double a, double b [DllImport("SimpleMath_x86" , EntryPoint = "Division" , CallingConvention = CallingConvention.Cdecl) ] public static extern double Division_x86 (double a, double b [DllImport("SimpleMath_x64" , EntryPoint = "Addition" , CallingConvention = CallingConvention.Cdecl) ] public static extern double Addition_x64 (double a, double b [DllImport("SimpleMath_x64" , EntryPoint = "Subtraction" , CallingConvention = CallingConvention.Cdecl) ] public static extern double Subtraction_x64 (double a, double b [DllImport("SimpleMath_x64" , EntryPoint = "Multiplication" , CallingConvention = CallingConvention.Cdecl) ] public static extern double Multiplication_x64 (double a, double b [DllImport("SimpleMath_x64" , EntryPoint = "Division" , CallingConvention = CallingConvention.Cdecl) ] public static extern double Division_x64 (double a, double b public static double Addition (double a, double b return Environment.Is64BitProcess ? Addition_x64(a, b) : Addition_x86(a, b); } public static double Subtraction (double a, double b return Environment.Is64BitProcess ? Subtraction_x64(a, b) : Subtraction_x86(a, b); } public static double Multiplication (double a, double b return Environment.Is64BitProcess ? Multiplication_x64(a, b) : Multiplication_x86(a, b); } public static double Division (double a, double b return Environment.Is64BitProcess ? Division_x64(a, b) : Division_x86(a, b); } }
这时再将控制台项目的目标平台修改为 Any CPU,我们的程序就不再受动态链接库的影响,无论分发到 64 位或者 32 位的系统上,都可以成功运行。
打包动态链接库到程序集 可以将流程归纳为以下几步:
将动态链接库设置为嵌入资源;
运行程序时判断进程是 32 位或 64 位,读取对应的动态链接库将文件写出到一个指定的路径;
使用 LoadLibrary 方法动态加载该程序集;
程序可以自由的调用由动态链接库导出的函数;
首先我们在项目中创建一个 Assets 文件夹,然后将两个动态链接库移动到该文件夹下,并将动态链接库文件的属性设置为 嵌入的资源。
然后我们需要从 kernel32 导出我们需要的函数:
1 2 3 4 5 6 7 8 static class Kernel32 { [DllImport("kernel32" , SetLastError = true) ] public static extern bool FreeLibrary (IntPtr hModule ) [DllImport("kernel32" , SetLastError = true) ] public static extern IntPtr LoadLibrary (string filename }
因我们需要根据执行进程加载动态链接库,那么执行函数时就不再需要判断当前是否位 64 位进程,SimpleMath 重新调整为原来的版本。
但是在程序运行时,我们需要将对应需要的文件动态加载,所以需要增加静态构造函数:
1 2 3 4 5 6 7 8 9 10 11 12 13 14 15 16 17 18 19 20 21 22 23 24 25 26 27 28 29 30 31 32 33 34 35 36 37 38 39 40 41 42 43 44 public class SimpleMath { static SimpleMath ( if (Environment.OSVersion.Platform != PlatformID.Win32NT) throw new PlatformNotSupportedException($"Platform {Enum.GetName(typeof (PlatformID), Environment.OSVersion.Platform)} is not supported" ); string resourceName = $"JohnSun.PackagingTest.DynamicLinkLibrary.Assets.SimpleMath_{(Environment.Is64BitProcess ? "x64" : "x86" )} .dll" ; string version = $"{System.Reflection.Assembly.GetExecutingAssembly().GetName().Version} _{(Environment.Is64BitProcess ? 64 : 32 )} " ; string directory = Path.Combine(Path.GetTempPath(), nameof (SimpleMath), version); if (!Directory.Exists(directory)) { Directory.CreateDirectory(directory); } string fileName = Path.Combine(directory, "SimpleMath.dll" ); using (Stream stream = typeof (SimpleMath).Assembly.GetManifestResourceStream(resourceName)) { FileInfo fileInfo = new FileInfo(fileName); if (!fileInfo.Exists || fileInfo.Length != stream.Length) { byte [] binary = new byte [stream.Length]; stream.Read(binary, 0 , binary.Length); File.WriteAllBytes(fileName, binary); } } Kernel32.LoadLibrary(fileName); } [DllImport("SimpleMath" , CallingConvention = CallingConvention.Cdecl) ] public static extern double Addition (double a, double b [DllImport("SimpleMath" , CallingConvention = CallingConvention.Cdecl) ] public static extern double Subtraction (double a, double b [DllImport("SimpleMath" , CallingConvention = CallingConvention.Cdecl) ] public static extern double Multiplication (double a, double b [DllImport("SimpleMath" , CallingConvention = CallingConvention.Cdecl) ] public static extern double Division (double a, double b }
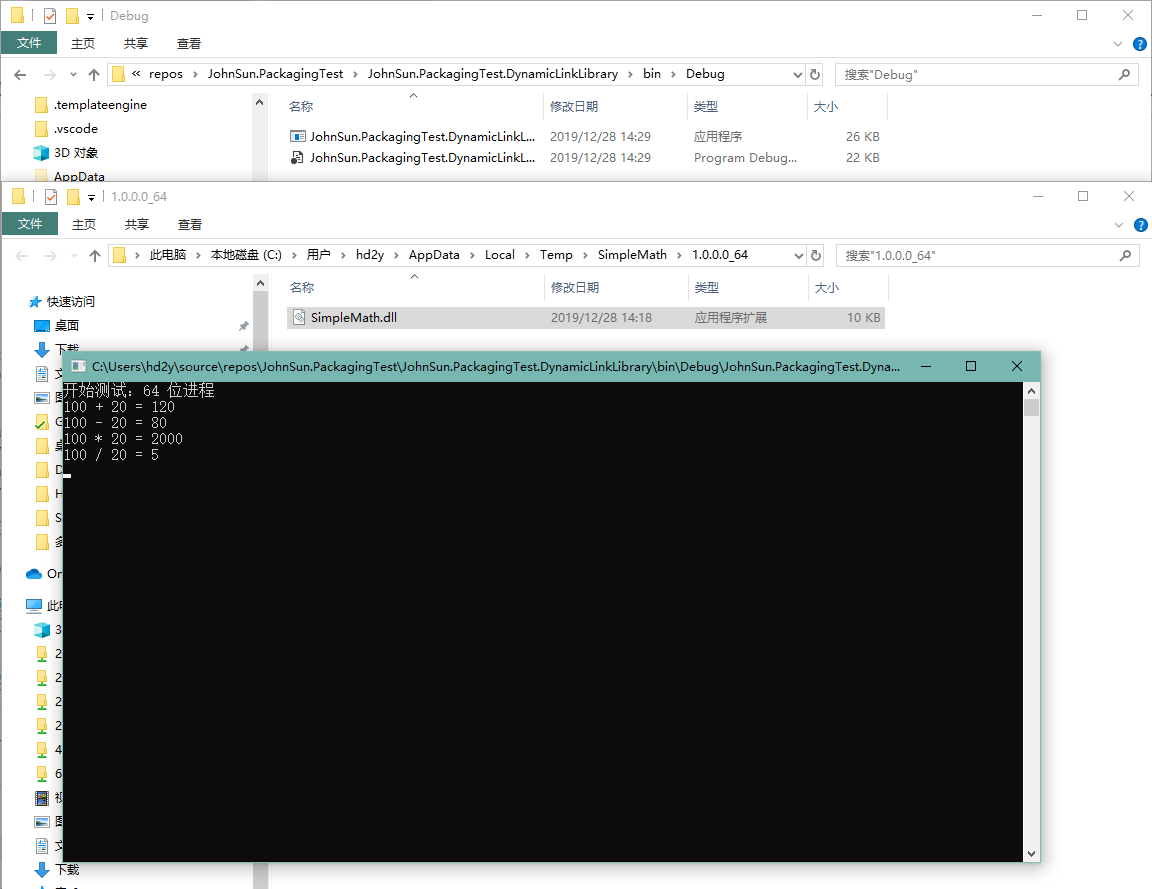
这时我们重新生成项目并运行,可以看到生成目录下已经不存在引用的动态链接库,但是程序可以正常运行(我们可以通过调试查看动态链接库被写出到什么位置):
注:因为我没有学习过 C++,所以动态链接库打包部分代码学习自 OpenHtmlToPdf 开源项目,能够学习到那么多优秀的解决方案,真的要感谢开源社区的大佬们 o( ̄▽ ̄ )ブ。
参考: