安装完成可以运行 MySQL 8.0 Command Line Client 进行管理,输入安装时设置的 root 用户密码登录即可。
登录以后可以简单做一些查询:
1 2 3
show databases; use mysql; select*fromuser;
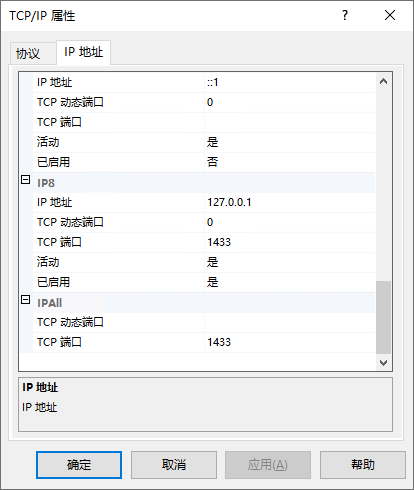
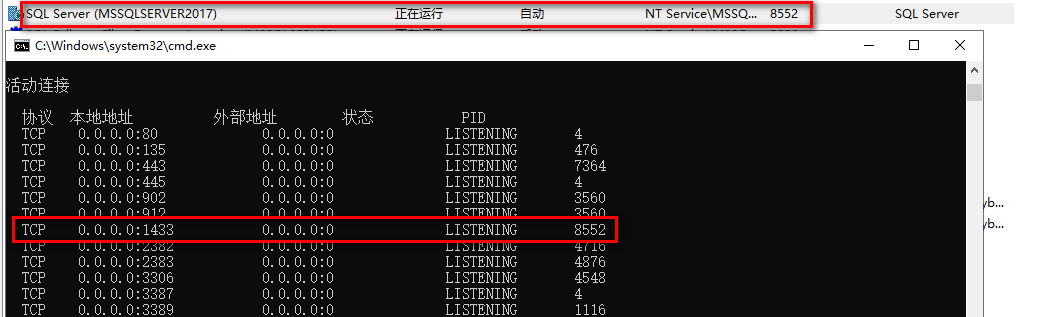
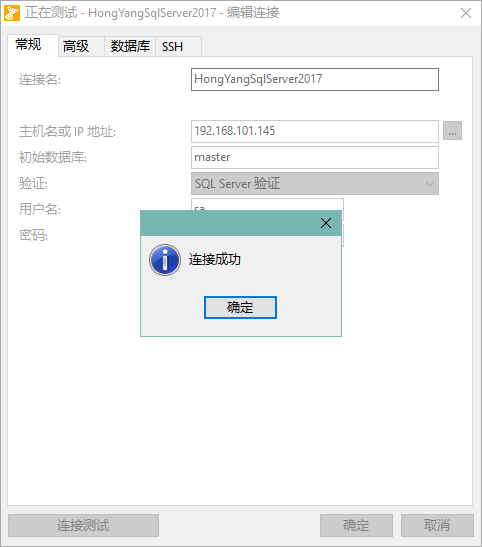
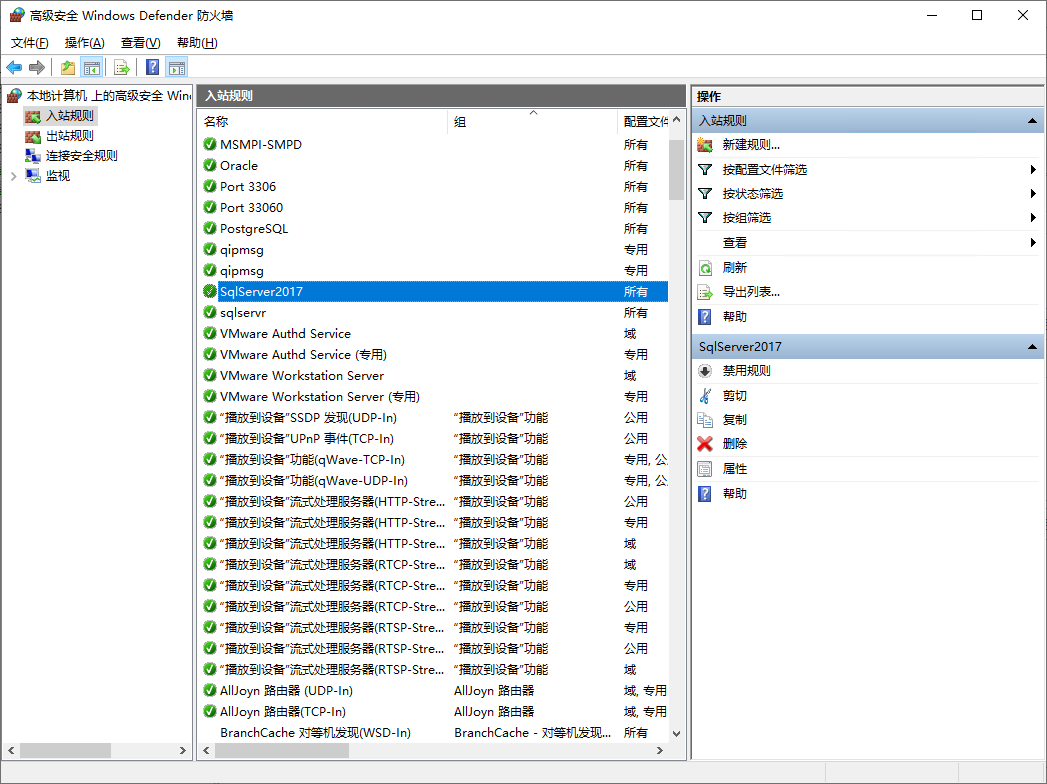
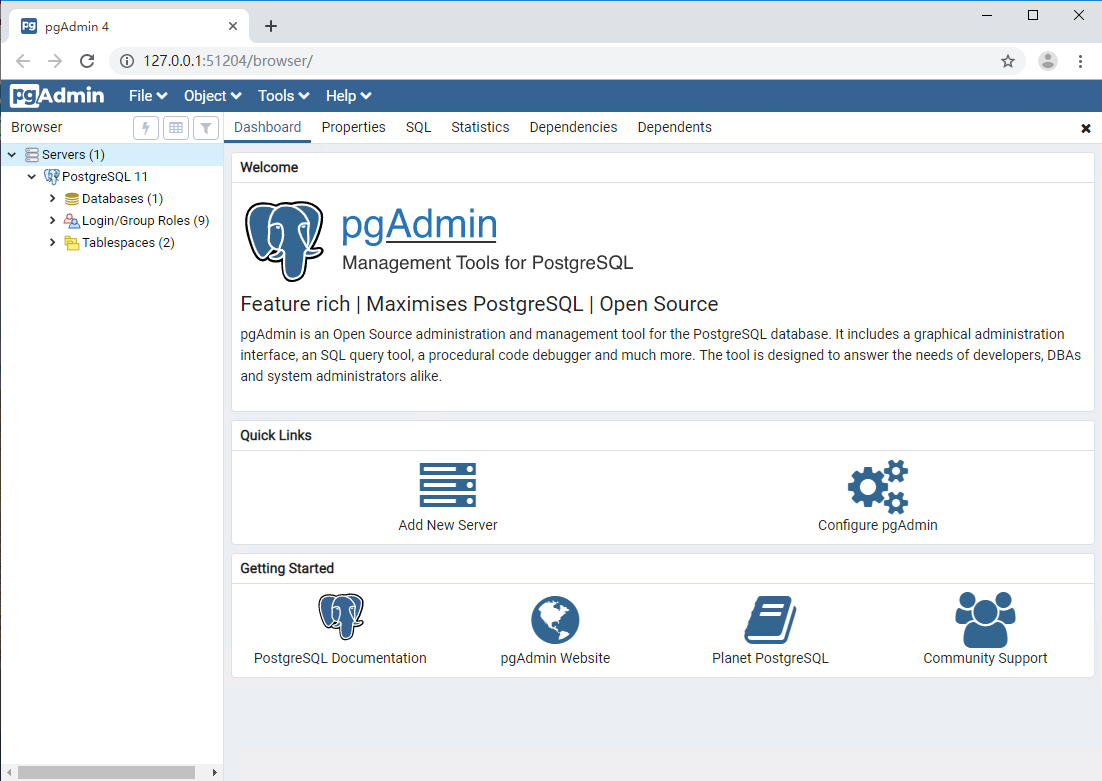
Navicat 连接数据库
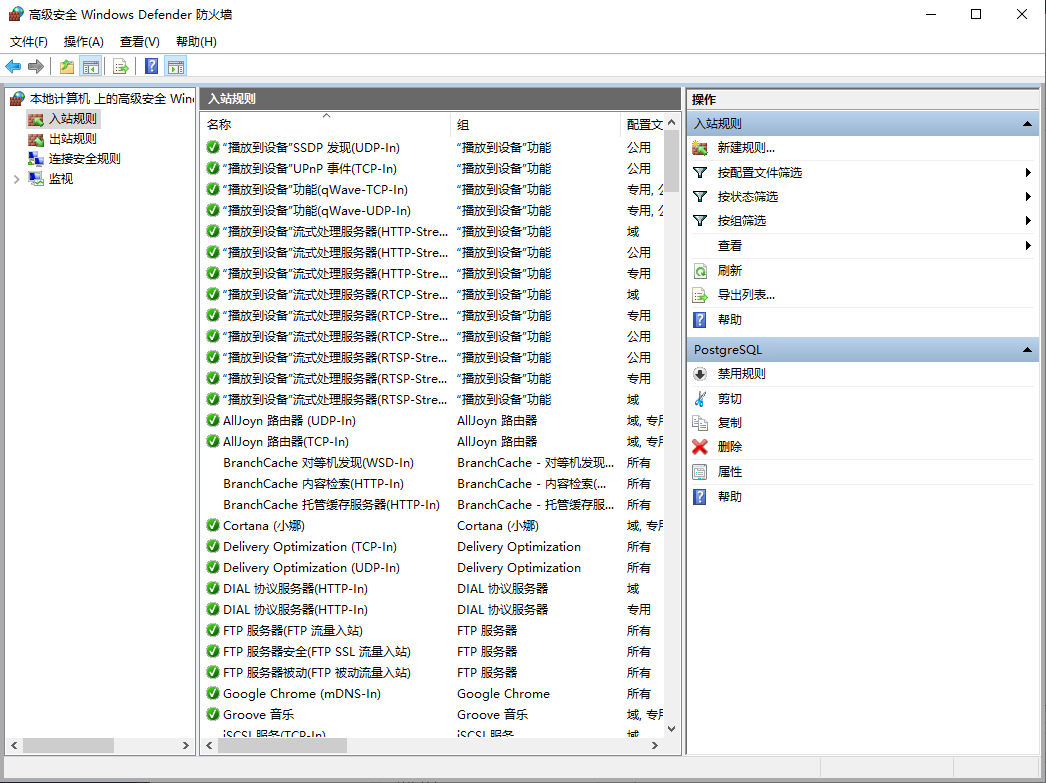
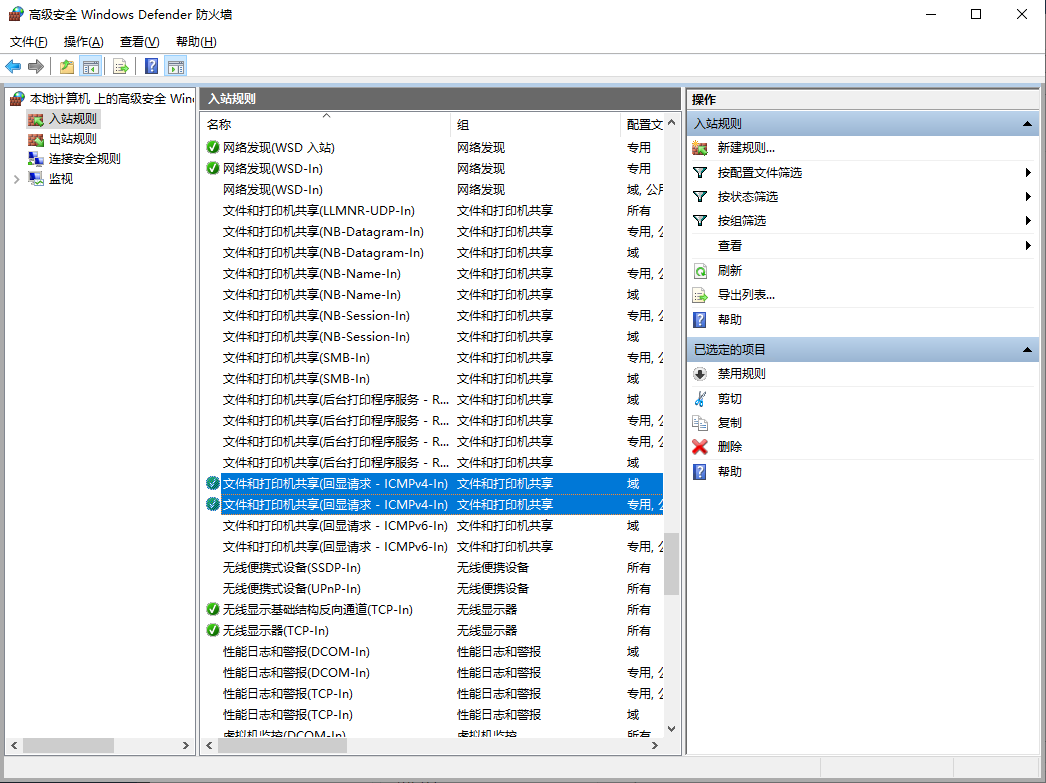
我是安装在局域网的远程机上,所以出现以下问题,这里做一个记录。
Error 1130
MySQL 8.0 Command Line Client 工具使用 root 用户登录数据库,执行以下内容:
1 2 3 4 5 6 7 8 9
use mysql; --正常安装后该字段为 host select'host'fromuserwhereuser='root'; --通配符 % 也可以指定具体的 IP 地址 update userset host ='%'whereuser='root'; --刷新 MySQL 的系统权限相关表 flush privileges; --重新查看 user 表是否修改成功 select'host'fromuserwhereuser='root';
运行 services.msc 找到 MySQL 8.0 的服务重启。
Error 2059
MySQL 8.0 之前的版本中加密规则为 mysql_native_password,而在MySQL 8.0 以后的加密规则为 caching_sha2_password,最直接的方案就是更新为旧版的加密规则。
因为服务重启,我们重新打开 MySQL 8.0 Command Line Client 登录用户 root,执行以下命令。
1 2
use mysql; alteruser'root'@'%' identified with mysql_native_password by'密码';
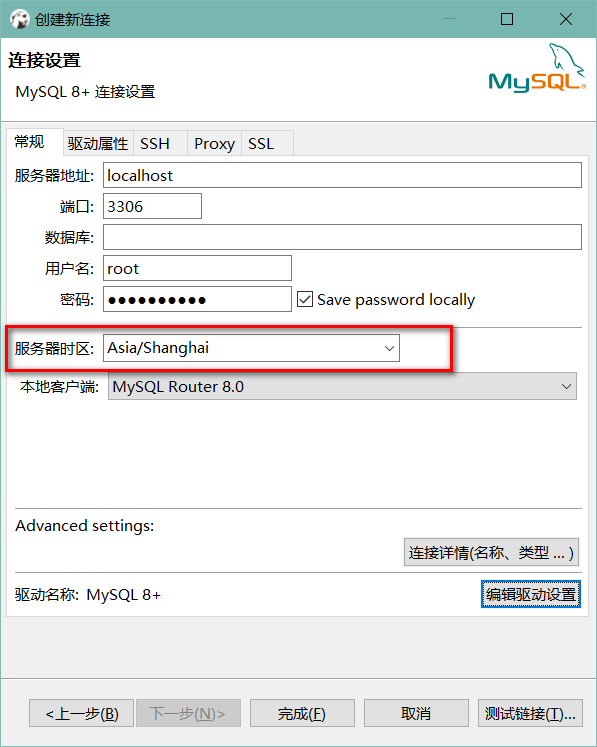
当安装数据库版本为 8.0.19 时,使用 DBeaver 连接报错:
1
The server time zone value '�й���ʱ��' is unrecognized or represents more than one time zone. You must configure either the server or JDBC driver (via the serverTimezone configuration property) to use a more specifc time zone value if you want to utilize time zone support.
// Rest days for 996 employees Day restDay = Day.Sunday;
Console.WriteLine($"The rest day for 996 employees is {restDay.ToString()}."); Console.WriteLine($"996 employees can only rest on {restDay} is {(Day)Enum.Parse(typeof(Day), "Sunday") == restDay}.");
// Output: // The rest day for 996 employees is Sunday. // 996 employees can only rest on Sunday is True.
需要注意的是,进行类型转换时,不能像 int 等类型使用关键字调用,只能用 Enum 来调用。另外建议如果不能确定是否能转换成功时,还是使用 TryParse 方法比较好,而且该方法是一个泛型的方法,可以直接指定返回的枚举类型。
1 2 3 4 5 6
// The working day of 997 employees is every day. string workDay = "Everyday"; Console.WriteLine($"997 employees can rest is {Enum.TryParse<Day>(workDay, out _)}.");
// Output: // 997 employees can rest is False.
默认情况下枚举是从 0 开始,我们也可以指定任意一个位置的实际指向的基类型的数值是多少,例如:
1
enum Month : byte { Jan = 1, Feb, Mar, Apr, May, Jun, Jul, Aug, Sep, Oct, Nov, Dec };
string num = "100.00"; bool isNumber = double.TryParse(num, System.Globalization.NumberStyles.None, null, out _); Console.WriteLine($"Number styles {System.Globalization.NumberStyles.None}{num} is number: {isNumber}"); isNumber = double.TryParse(num, System.Globalization.NumberStyles.AllowDecimalPoint, null, out _); Console.WriteLine($"Number styles {System.Globalization.NumberStyles.AllowCurrencySymbol}{num} is number: {isNumber}"); isNumber = double.TryParse(num, System.Globalization.NumberStyles.AllowExponent, null, out _); Console.WriteLine($"Number styles {System.Globalization.NumberStyles.AllowExponent}{num} is number: {isNumber}");
num = "1e-10"; isNumber = double.TryParse(num, System.Globalization.NumberStyles.None, null, out _); Console.WriteLine($"Number styles {System.Globalization.NumberStyles.None}{num} is number: {isNumber}"); isNumber = double.TryParse(num, System.Globalization.NumberStyles.AllowDecimalPoint, null, out _); Console.WriteLine($"Number styles {System.Globalization.NumberStyles.AllowCurrencySymbol}{num} is number: {isNumber}"); isNumber = double.TryParse(num, System.Globalization.NumberStyles.AllowExponent, null, out _); Console.WriteLine($"Number styles {System.Globalization.NumberStyles.AllowExponent}{num} is number: {isNumber}");
// Output: // Number styles None 100.00 is number: False // Number styles AllowCurrencySymbol 100.00 is number: True // Number styles AllowExponent 100.00 is number: False // Number styles None 1e-10 is number: False // Number styles AllowCurrencySymbol 1e-10 is number: False // Number styles AllowExponent 1e-10 is number: True
var left = visitor.Replace(expr1.Body); var right = visitor.Replace(expr2.Body); var body = Expression.And(left, right); return Expression.Lambda<Func<T, bool>>(body, parameterExpression); } publicstaticExpression<Func<T, bool>> Or<T>(this Expression<Func<T, bool>> expr1, Expression<Func<T, bool>> expr2) { if (expr1 == null) return expr2; elseif (expr2 == null) return expr1;
ParameterExpression parameterExpression = Expression.Parameter(typeof(T), "t"); ExpressionVisitorExtend visitor = new ExpressionVisitorExtend(parameterExpression);
var left = visitor.Replace(expr1.Body); var right = visitor.Replace(expr2.Body); var body = Expression.Or(left, right); return Expression.Lambda<Func<T, bool>>(body, parameterExpression); } publicstaticExpression<Func<T, bool>> Not<T>(this Expression<Func<T, bool>> expr) { if (expr == null) returnnull;
var candidateExpr = expr.Parameters[0]; var body = Expression.Not(expr.Body);
using System; using System.Collections.Generic; using System.Linq; using System.Reflection;
namespaceJohnSun.ExpressionTest.ConsoleApp { publicclassReflectionMapper { ///<summary> /// 反射方式实现类型转换 ///</summary> ///<typeparam name="TIn"></typeparam> ///<typeparam name="TOut"></typeparam> ///<param name="tIn"></param> ///<returns></returns> publicstatic TOut Trans<TIn, TOut>(TIn tIn) { List<FieldInfo> tInFields = typeof(TIn).GetFields().ToList(); List<PropertyInfo> tInProps = typeof(TIn).GetProperties().ToList(); List<FieldInfo> tOutFields = typeof(TOut).GetFields().ToList(); List<PropertyInfo> tOutProps = typeof(TOut).GetProperties().ToList(); TOut tOut = Activator.CreateInstance<TOut>(); foreach (var field in tOutFields) { var tempField = tInFields.Find(f => f.Name == field.Name && f.FieldType == field.FieldType); if (tempField != null) { field.SetValue(tOut, tempField.GetValue(tIn)); } } foreach (var prop in tOutProps) { var tempProp = tInProps.Find(p => p.Name == prop.Name && p.PropertyType == prop.PropertyType); if (tempProp != null) { prop.SetValue(tOut, tempProp.GetValue(tIn, null), null); } }
return tOut; } } }
调用:
1 2 3 4 5 6
User user = new User() { Id = 1, Name = "Kangkang", Email = "kangkang@qq.com", Age = 17, CreateDate = new DateTime(2015, 1, 1) }; Console.WriteLine("***反射转换***"); { UserCopy copy = ReflectionMapper.Trans<User, UserCopy>(user); Console.WriteLine($"Id:{copy.Id} Name:{copy.Name} Email:{copy.Email}"); }
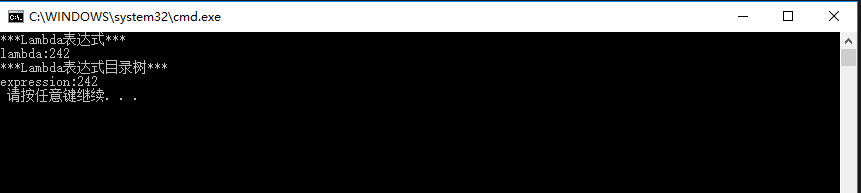
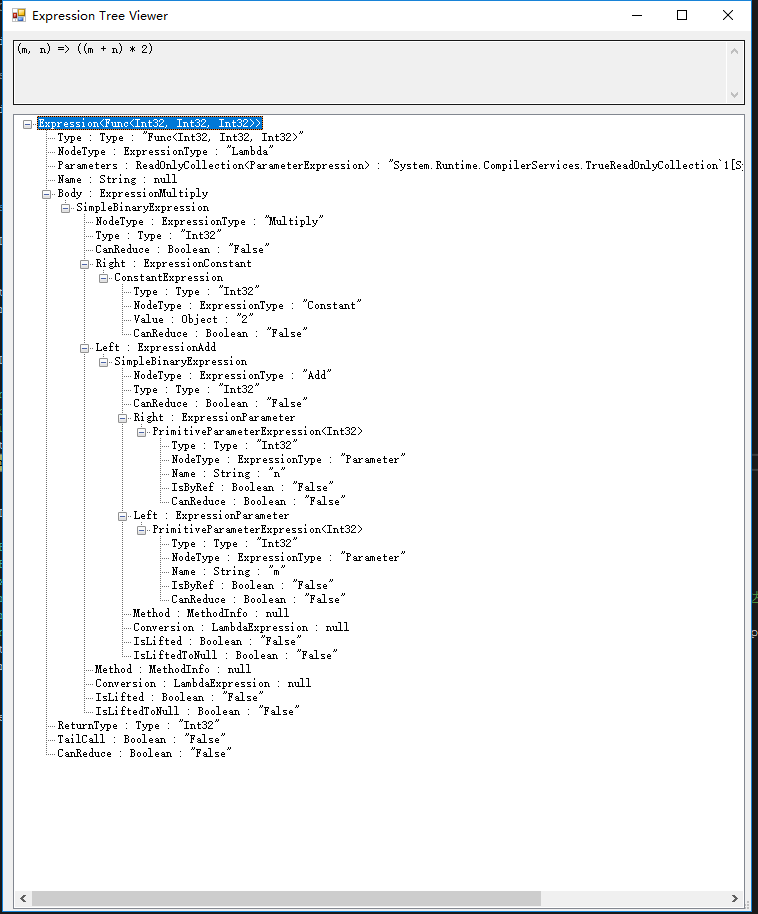
表达式目录树
首先需要理解一下表达式目录树如何实现转换:
1 2 3 4 5 6 7
User user = new User() { Id = 1, Name = "Kangkang", Email = "kangkang@qq.com", Age = 17, CreateDate = new DateTime(2015, 1, 1) };
Console.WriteLine("***Lambda表达式目录树模仿硬编码***");
{
    Expression<Func<User, UserCopy>> expression = u => new UserCopy() { Id = u.Id, Name = u.Name, Email = u.Email };
    UserCopy copy = expression.Compile()(user);
    Console.WriteLine($"Id:{copy.Id} Name:{copy.Name} Email:{copy.Email}");
}
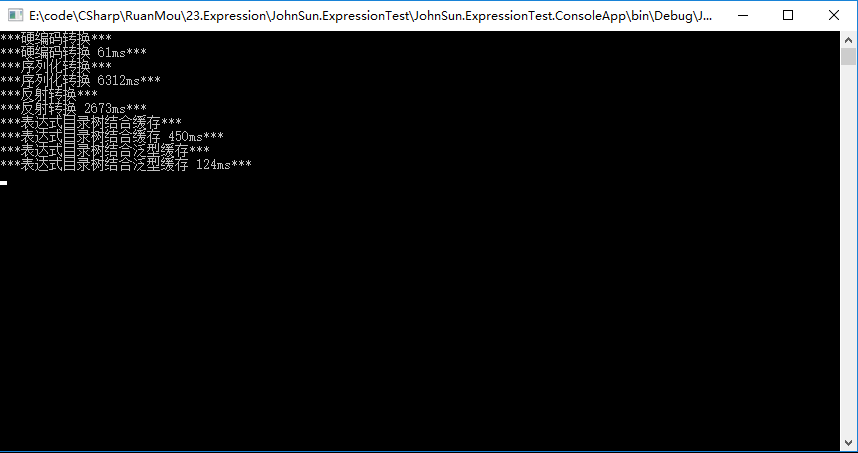
long time = 0;
User user = new User() { Id = 1, Name = "Kangkang", Email = "kangkang@qq.com", Age = 17, CreateDate = new DateTime(2015, 1, 1) };
Console.WriteLine("***硬编码转换***");
{
    Stopwatch watch = new Stopwatch();
    int sum = 0;
    watch.Start();
    for (int i = 0; i < 1000000; i++)
    {
        UserCopy copy = ObjectMapper.TransUserCopy(user);
        sum += copy.Id;
    }
    watch.Stop();
    time = watch.ElapsedMilliseconds;
}
Console.WriteLine($"***硬编码转换 {time}ms***");
Console.WriteLine("***序列化转换***");
{
    Stopwatch watch = new Stopwatch();
    int sum = 0;
    watch.Start();
    for (int i = 0; i < 1000000; i++)
    {
        UserCopy copy = SerializeMapper.Trans<User, UserCopy>(user);
        sum += copy.Id;
    }
    watch.Stop();
    time = watch.ElapsedMilliseconds;
}
Console.WriteLine($"***序列化转换 {time}ms***");
Console.WriteLine("***反射转换***");
{
    Stopwatch watch = new Stopwatch();
    int sum = 0;
    watch.Start();
    for (int i = 0; i < 1000000; i++)
    {
        UserCopy copy = ReflectionMapper.Trans<User, UserCopy>(user);
        sum += copy.Id;
    }
    watch.Stop();
    time = watch.ElapsedMilliseconds;
}
Console.WriteLine($"***反射转换 {time}ms***");
Console.WriteLine("***表达式目录树结合缓存***");
{
    Stopwatch watch = new Stopwatch();
    int sum = 0;
    watch.Start();
    for (int i = 0; i < 1000000; i++)
    {
        UserCopy copy = ExpressionMapper.Trans<User, UserCopy>(user);
        sum += copy.Id;
    }
    watch.Stop();
    time = watch.ElapsedMilliseconds;
}
Console.WriteLine($"***表达式目录树结合缓存 {time}ms***");
Console.WriteLine("***表达式目录树结合泛型缓存***");
{
    Stopwatch watch = new Stopwatch();
    int sum = 0;
    watch.Start();
    for (int i = 0; i < 1000000; i++)
    {
        UserCopy copy = ExpressionGenericMapper<User,UserCopy>.Trans(user);
        sum += copy.Id;
    }
    watch.Stop();
    time = watch.ElapsedMilliseconds;
}
Console.WriteLine($"***表达式目录树结合泛型缓存 {time}ms***");
using System; using System.Collections.Generic; using System.Linq; using System.Web; using System.Web.Mvc; using System.Web.Optimization; using System.Web.Routing;
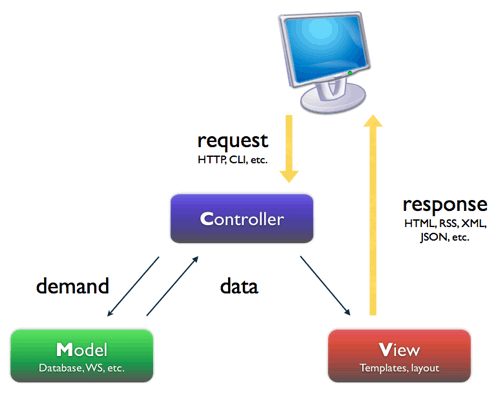
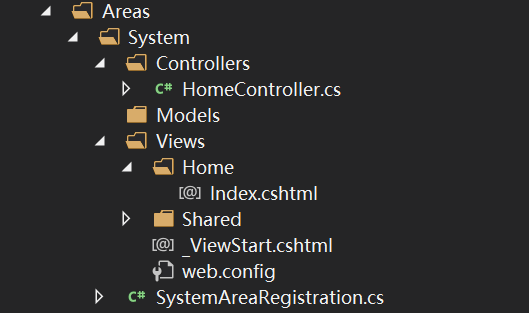
如果在默认的目录结构下业务混合,这样不方便管理和维护;如果另开新项目,又比较散乱。那么 MVC 有没有这样一种机制来相对独立这些模块呢?答案是肯定的,这就是 MVC 的 Area 区域技术,用来实现在一个 MVC 项目中组织和维护多个相对独立的模块。
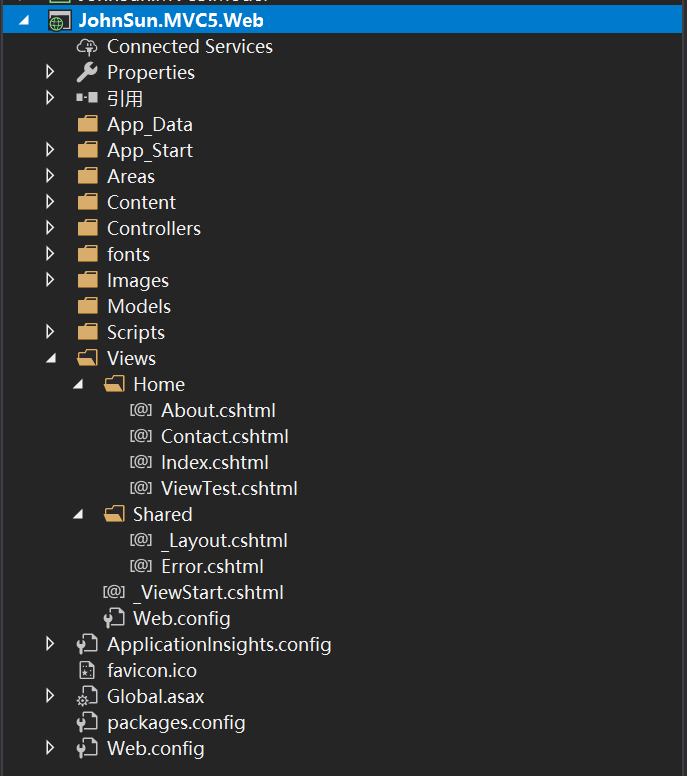
在 VS 中右键单击项目,在弹出的菜单中选择“添加 (A)”->“Area…”,在弹出的对话框中输入区域名称(遵守 C# 标示符命名规则)即可(比如输入 System),VS 将自动在根目录创建 Areas 文件夹,此文件夹下每个独立的 Area 一个文件夹,System 文件夹内也是一样的 Models、Controllers、Views 结构。
唯一不同的是多了一个 SystemAreaRegistration.cs(区域注册类),用于向 MVC 框架注册路由等信息,Global.asax.cs 中会自动调用该类的 RegisterArea 方法。新建 Area 后 VS 自动创建相关目录结构,按需修改 SystemAreaRegistration 路由即可。
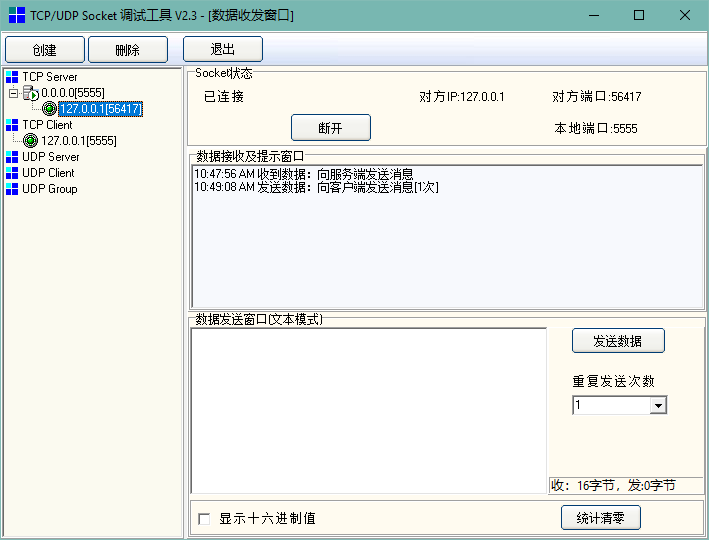
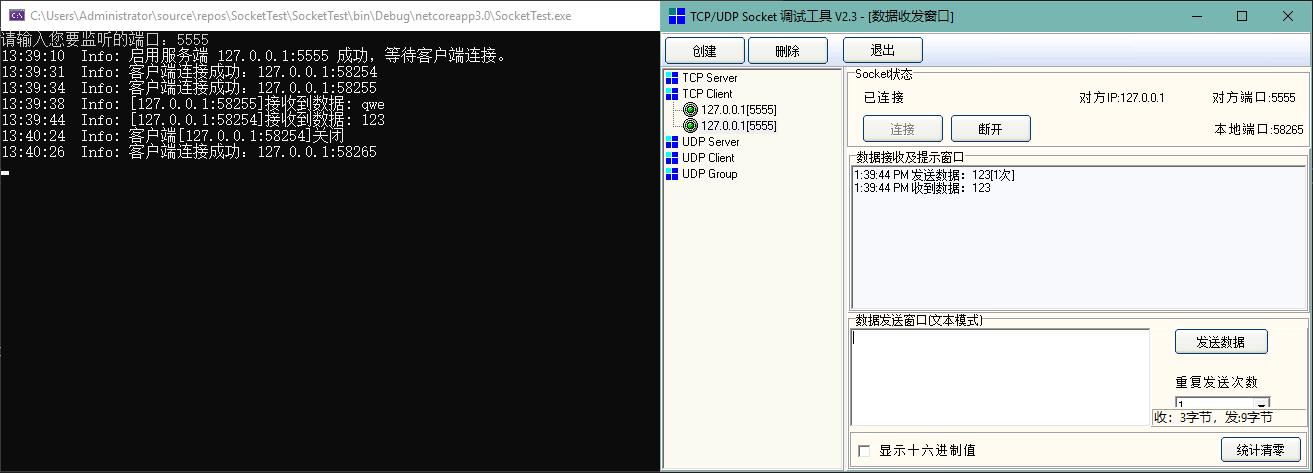
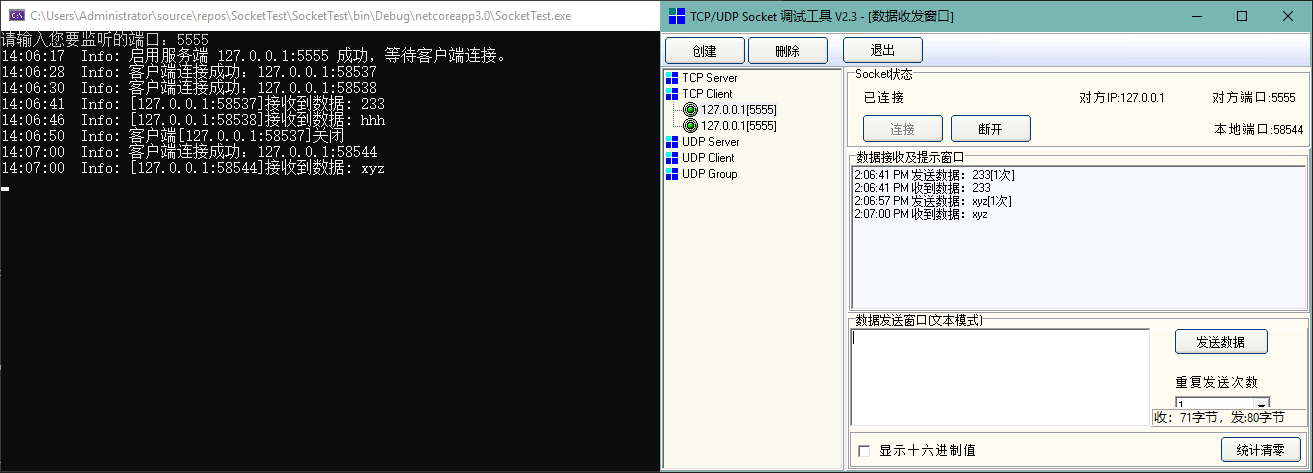
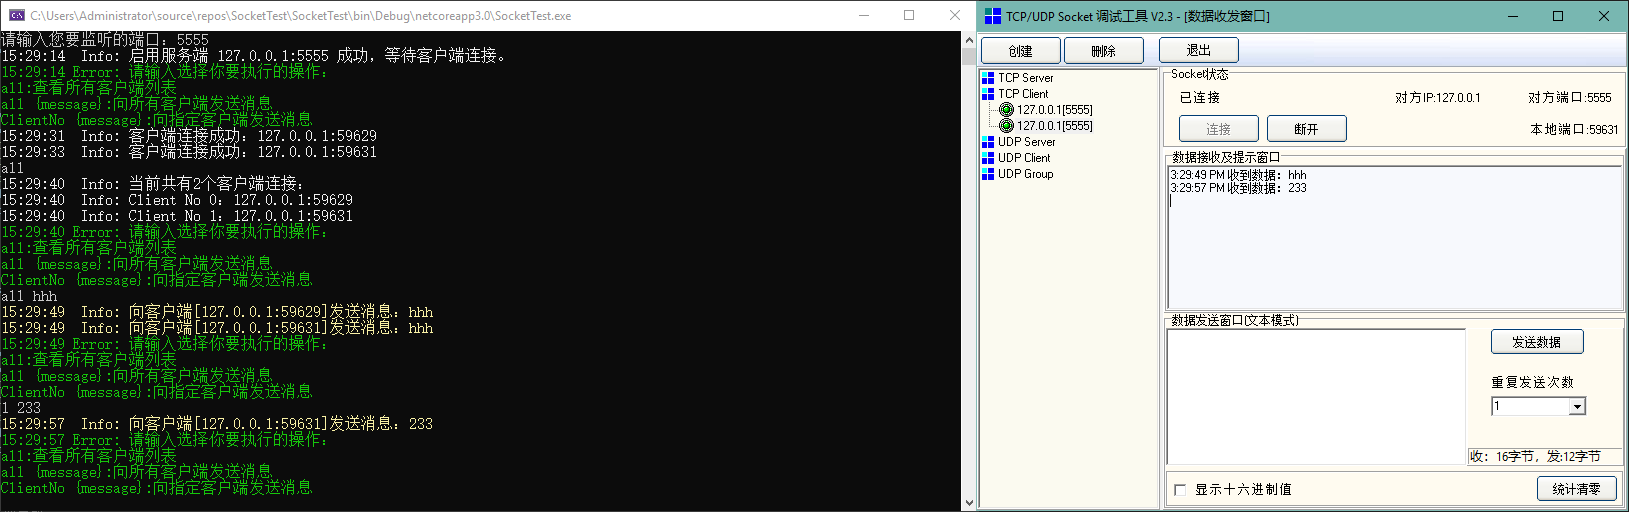
using System; using System.Collections.Concurrent; using System.Collections.Generic; using System.Net; using System.Net.Sockets; using System.Text.RegularExpressions; using System.Threading.Tasks;